1 - How do I set up a password for the DNET01/DGQG02/DGQG04 to secure my GoldenGate and Domintell Pilot Classic connections?
- Follow these steps:
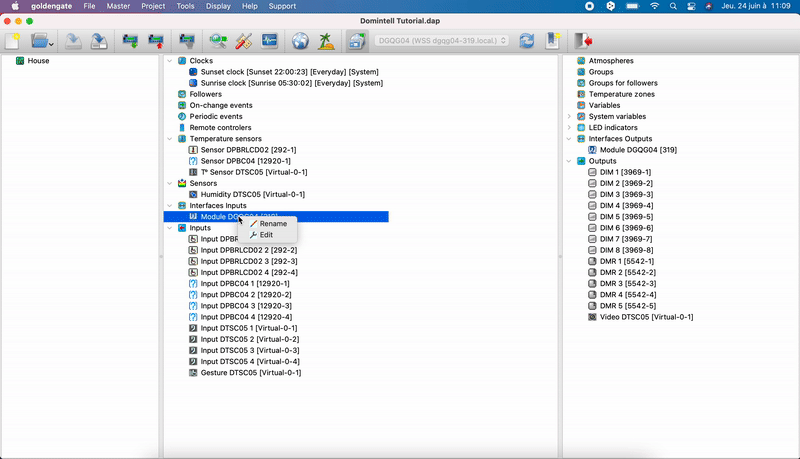
- Right-click on the module
- Click on Edit
- Go to the Passwordstab
- Click on Add an account
- Enter a username and password, check your options and click OK.
- You must be logged in to the module for the Passwords tab to be available
- WARNING: Once the password has been set, there is no way to recover it if it is lost
5. I need to replace a module in my installation. How do I apply this replacement in my configuration?
- If it is the same module (same part number), replace module type A with module type A. This can be done in Tools -> Module management
- A scan must first be run to recognise the new module. The old module will be displayed as missing
In module managementRight-click on the missing module and select replace. GoldenGate will propose by default to replace the old module by the new one (with corresponding serial number)
- If it is a module of the same type but not of the same reference (e.g. replace a DPBTLCD with a DPBRLCD), the module replacement is done in Tools -> Module transformation
- Select the type of module (relays, dry contacts, touchscreens etc.)
- Turn the old module into a new one
7. Which modules are no longer (or not yet) supported by GoldenGate?
- Please consult the Changelog, go to Help -> History
8. How can I "flash" the Master and update the other modules?
- All updates are made from Tools -> Updates and diagnosis.
- The software gives a general diagnosis (with a possible scan) followed by a notification if an error is detected somewhere.
- The Updates tab indicates the modules that need to be updated. They are performed in this window.
- If the installation features a DGQG01: it is recommended to perform any update via USB connection.
- The update of the DGQG02/04 and DNET01 takes 20 to 30 min. The connection with the Master will be lost during the update.
- The Updates window shows the stage of the update and the time remaining before it is completed
- Once the time has elapsed, please redo a diagnosis to verify that the update went well and that the module is up to date.
9 - I can't find DNET01/DNET02/DGQG02/DGQG04/DGQG05 in the list of communication ports. What should I do?
- Check the UTP connection with the module
- Check your network connection
- Are the orange and green lights on/flashing?
- Is the module connected to the same network as the PC/Mac?
- Check that your Ethernet modules are on the same computer network (subnet mask). To do this, depending on your operating system:
- Windows: openCommand Prompt (Windows key + R and type 'cmd' then click OK) and type 'ipconfig' then press Enter.
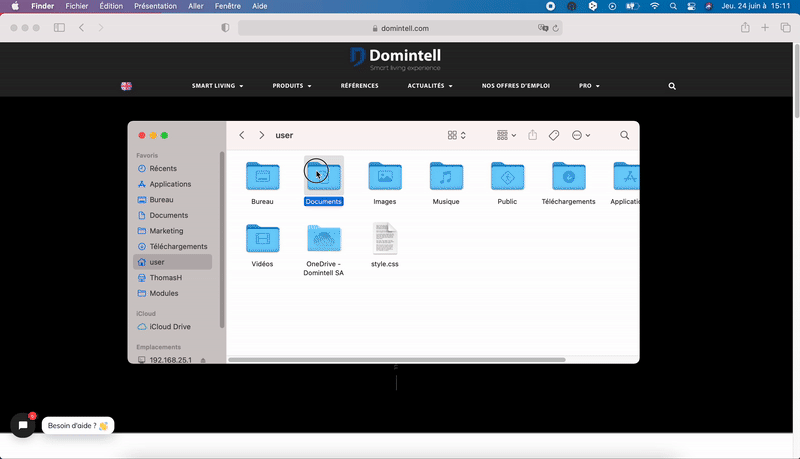
- Mac: open the Finder then go to Applications -> Utilities -> Type 'ifconfig' and press 'Enter'.
- You can then check that the network your computer is connected to is the same as the one in the module in the information now listed. For every '255' in the netmask, the corresponding number in each IP must be the same (e.g. for 255.255.0.0, both IPs must start with the same two numbers, e.g. 192.168.x.x). If in doubt, consult a network administrator or use an application such as 'Fing' to find the Ethernet module and its IP address. Try to connect to the module by adding the communication port manually (see 40. How do I add a Communication Port manually?)
- The module may take 2-3 minutes to (re)start after a power failure.
11. Which modules are compatible with GoldenGate 1.4x and GoldenGate > 3.x
- See the changelogs of each of the two branches of GoldenGate.
- Go to Help -> History
- The modules not supported or not yet supported are listed in the document. This same list is included in the document " from DGQG01 to DGQG04"available on the PRO website.
- Make sure you always use the latest version of GoldenGate. To be sure, go to Help -> Search for updates.
 GoldenGate will tell you whether or not you are working with the latest version.
12 I can't connect to DNET01/DNET02/DGQG02/DGQG04/DGQG05. What should I do?
- Is the module automatically found in the list of communication ports?
- Yes:
- Use port: ' [module] s/n [module serial number] (WSS [module IP address]) '
- If an error notification appears, please refresh the list of communication ports or close and restart GoldenGate and try again.
- No, the module is not automatically found in the list of communication ports:
- Check the UTP connection with the module
- Check your network connection
- Are the orange and green lights on/flashing?
- Is the module connected to the same network as the PC/Mac?
- Check that your Ethernet modules are on the same computer network (subnet mask). To do this, depending on your operating system:
- Windows: openCommand Prompt (Windows key + R and type 'cmd' then click OK) and type 'ipconfig' then press Enter.
- Mac: open the Finder then go to Applications -> Utilities -> Type 'ifconfig' and press 'Enter'.
- You can then check that the network your computer is connected to is the same as the one in the module in the information now listed. For each '255' in the netmask, the corresponding number in each IP must be the same (e.g. for 255.255.0.0, both IPs must start with the same two numbers, e.g. 192.163.x.x). If in doubt, consult a network administrator or use an application such as 'Fing' to find the Ethernet module and its IP address. Try to connect to the module by adding the communication port manually (see 40. How do I add a Communication Port manually?)
13 I can't update my DVIP01/DTSC0x/DNET0x/DGQG02/04/05. What should I do?
- All updates are made from Tools -> Updates and diagnosis
- Please check if an error notification has appeared :
- Is the module missing?
- (Re)scan the network
- Check the wiring
- Check if the IP address of the module is valid :
- The IP addresses '0.0.0.0' or '169.x.x.x' are not valid.
- Please check your network connection and/or the UTP (RJ45) cable connection on the module and on the switch/router/modem.
- Please note! Some modules may take up to 30 minutes to update. The progress of the update process is displayed in the GoldenGate Updates and Diagnostics window
- Is the module missing?
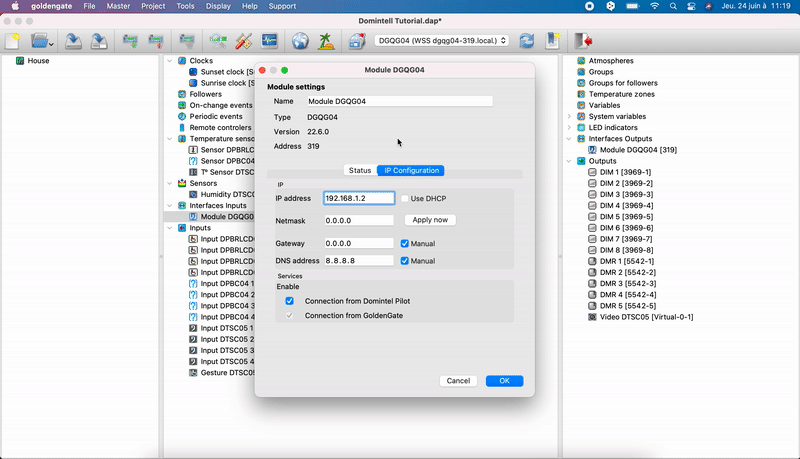
14. How do I assign a fixed IP address to a module (which requires an Ethernet connection)?
- Please first make sure that the address you wish to assign is valid and free:
- The module is by default in DHCP
- Connect to the module using DHCP
- The IP address is provided in the list of communication ports.
- This address is therefore valid and taken by the module in question, so you can use it as a fixed IP address.
- You can also insert another address if you wish to do so
- Windows: openCommand Prompt (Windows key + R and type 'cmd' then click OK) and type 'Ping' followed by a space and the IP address you wish to use
- Mac: open the Finder then go to Applications -> Utilities -> Type 'ping' followed by a space and the IP address you wish to use
- If there is no response, this indicates that this IP address has not been assigned to any device in the network -> this IP address is therefore free
- Right-click on the Ethernet module
- Click on Edit -> IP Configurationtab
- Uncheck DHCP
- Insert the fixed IP address
- Fill in the Network Mask:
- Windows: openCommand Prompt (Windows key + R and type 'cmd' then click OK) and type 'ipconfig' then press Enter.
- Mac: open the Finder then go to Applications -> Utilities -> Type 'ifconfig' and press 'Enter'.
- The netmask is given as well as the IP address of the modem (= 'Gateway') and of your PC.
- For a remote connection, you will also need to fill in the 'gateway'. For more information, please refer to question 29. How do I connect remotely to Master DGQG02/03/04? and 38. How do I set up Port Forwarding to establish a GoldenGate connection with Master remotely (for DGQG02/04/05)?
- Select Apply now in the IP configurationtab
- Press OK
- Cut off the connection => refresh the list of communication ports ("refresh" icon)
- Connect to the module again (the address may have changed if you did not use the DHCP one).
- Send the application to Master : menu Master => Write application
15. How do I get the network information needed for the Local or Remote connection?
- Windows: openCommand Prompt (Windows key + R and type 'cmd' then click OK) and type 'ipconfig' then press Enter.
- Mac: open the Finder then go to Applications -> Utilities -> Type 'ifconfig' and press 'Enter'.
- The information (subnet mask, gateway, computer IP address etc.) is then listed and sorted according to the type of connection (Wi-Fi or Ethernet).
- For a connection localEdit the module in GoldenGate => IP configuration:
- Enter the IP (fixed or DHCP)
- Enter the subnet mask
- For a remote connection, edit the module in GoldenGate -> IP configuration:
- Enter the IP (fixed or DHCP)
- Enter the subnet mask
- Enter the gateway (= local IP of your modem)
- Set DNS address => see question 24. How do I configure DynDNS (DGQG02/04/05 only)?
19. The follower LEDs of my push buttons do not change colour when pressed. What should I do?
- Check if the followers are configured in your configuration file (DAP file).
- You can set up automatic trackers (recommended): right-click on Followers (entry column) => create automatic followers
- If you create automatic followers, you cannot create followers manually and vice versa.
23. How do I import images for the LCD module?
- Go to Tools => Add images for DPBLCD0x
- Right-click in the Image List window and select Import New Image => select the image(s) from the file explorer
- Edit the DPBLCD0x in question and select custom from the second drop-down menu on the Configurationtab
- Double-click on the icon you want to change
- Go to the tab imported => drag the desired image to the corresponding state (On/Off)
24. How to configure the DynDNS (only for DGQG02/04)?
- Please first create a DynDNS domain via dyndns.com (chargeable) or no-ip.com (free but requires account revalidation every 30 days). For more information on the DNS creation process, please consult the "IP & port forwarding" documentation in the Guides section of the Pro Domintell website.
- Connect to the DGQG0x Master
- Go to Project tab => Regional settings => DynDNStab
- Check Enabled
- Fill in the requested information

- Fill in the "Gateway" in the tab Configuration IP of DGQG02/04, see question 15. How do I get the network info needed for Local or Remote connection?
- Perform Port Forwarding, either via UPnP or manually in the modem. See question 38. How do I set up Port Forwarding to establish a remote connection between GoldenGate and Master (for DGQG02/04/05)?
25. How to set the Master and the installation on time?
- Manually:
- Go to menu Master => set Master to time
- Set the Master and the installation to the desired time
- Via NTP:
- Right-click on the Ethernet module and Edit
- Fill in all the boxes in the ip configuration tab (see question 15. How do I get the network info needed for Local or Remote connection? for IP, Mask and Gateway). For DNS, fill in the same address as for Gateway or insert 8.8.8.8
- Go to Master -> Set Master to time
- Check NTP and select your time zone (for example UTC + 1)
26. I don't have any image in the DPBRLCD. What should I do?
- You need to regenerate the image database:
- Close GoldenGate
- Open GoldenGate and make sure to leave it empty, do not open a file or read the Master application.
- Go to the menu Support => Regenerate the image database (this may take several minutes)
- Open the configuration file and check if the DPBRLCDs display the images(edit the module)
- Send the application to Master via the menu Master -> Transfer application
28. How do I configure the NTP?
- Fill in all the boxes in IP Configuration (see question 15. How do I get the necessary network info for Local or Remote connection? for IP, Mask and Gateway). For DNS, enter the same address as the Gateway or insert 8.8.8.8
- Go to menu Master => Set Master to time
- Check NTP and select your time zone (e.g. UTC + 1)

29. How can I connect remotely to Master DGQG02/04/05?
- Right-click on the module then Edit => IP Configuration tab:
- Insert IP (fixed or DHCP)
- Subnet mask
- Gateway (= local IP of your modem)
- Go to Regional settings => DynDNS => fill in the window with your data
- For more information on DynDNS, please see question 24. How do I configure DynDNS (DGQG02/04/05 only)?
- Add the port manually (with the2nd icon on the right in the icon panel) to your modem by inserting the domain name, port 17483 and password + user name; if these are configured for DGQG02/04/05
- Perform Port Forwarding. See question 38. How do I set up Port Forwarding to establish a remote connection between GoldenGate and Master (for DGQG02/04/05)? for more details
- Insert IP (fixed or DHCP)
32. The module is no longer responding. How can I address this? (GoldenGate software)
- Check that you have the latest version of GoldenGate (or Domintell2 for older installations)
- Go to Updates and diagnosis => do you have an error notification?
- Is the module present in your tree? => If not, run a network scan (tab Master => Network scan tab)
- If none of these solutions have identified the problem, contact support@domintell.com
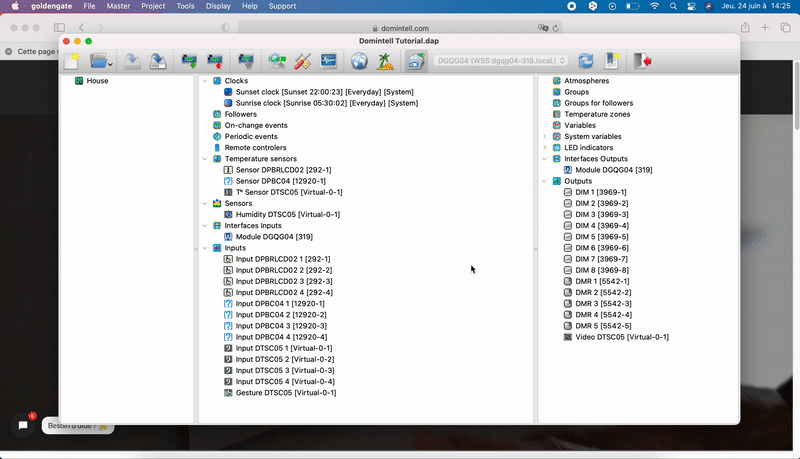
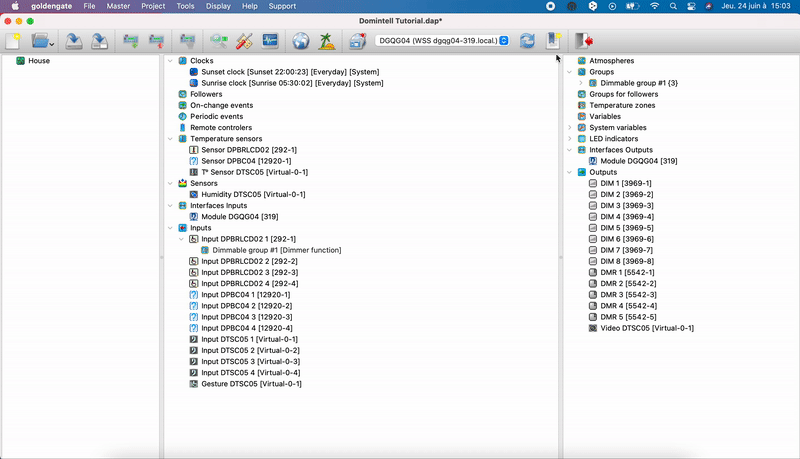
33. I want to create a group of dimmers only, but when I create a link to an input, GoldenGate does not offer me an action 'dimmer function', 'dimmer value', 'value dimmer/OFF', etc. action. What do I have to do?
- All the outputs concerned must be dimmers.
- A dimmer group must be created: Dimmer group (mixed dimmers) or DALI group (DALI outputs only) :
- Right-click on group
- Add Dimmers/DALI Group
- Specify the outputs to be added to this group
- Create the group
- Make the link with the input
- The different "dimmer" actions will then be suggested
40. How do I add a Communication Port manually?
- Write down the IP address of the module, retrieved through the 'Fing' application, for example (or use the IP address in GoldenGate if you can already connect to the module).
- Add the communication port in GoldenGate manually; Add a port manually (penultimate icon in the icon bar) => enter the URL : " wss://'address iP' :17483 ?alias='name'&type='type module' "
44. I want to delete several communication ports in GoldenGate. How do I do this?
- Ports you have added manually will always be visible in GoldenGate. Those found automatically (with an update of the communication ports list) will disappear if they are no longer scanned on the Ethernet network.
- Close GoldenGate
- Go to 'C:\Users\Documents\Domintell2\cfg'
- Open the.ini file (with notepad if not configured by default)
- Delete the entire line or port in question at customCom= in [Communication].
- Save the file
- Open GoldenGate
- The port(s) has/have been deleted.
47. How do I know if my installation is running with the latest version of GoldenGate?
- Note: it is always advised to work with the latest version of GoldenGate
- To find out if you are already working with this latest version go to the Help then Search for updates
- To get this latest version:
- Go/register on the Pro website Domintell or contact support at support@domintell.com
48. How can I easily change the temperature/regulation mode of a temperature sensor?
- You can change it in several different ways:
- From an LCD screen or a DTSC0x (LCD only for the probe associated with the LCD module)
- From the Domintell Pilot smartphone application
- From a pushbutton
- LCD or DTSC:
- The desired mode(s) must be displayed on the LCD or the DTSC0x in order to change them.
- Go to the probe in question by editing the probe (right-click on the probe then Edit)
- Go to the menu Temperature mode or Control mode
- Check the desired modes to be displayed on the LCD or DTSC0x.
- Press OK and send the application to Master (Master -> Writing application)
- You can now change the mode by pressing the currently active mode on the LCD or the DTSC0x
- (From the DTSC0x, you can change the modes of all the probes that are controllable from this screen. For more details, see question 2. How do I structure my installation (tree structure) for a DTSC0x screen?
- Domintell Pilot:
- Same as for LCD and DTSC0x
- Once the mode is checked in the respective menu, you can select it in the Pilot application by directly pressing the respective sensor in the application.
- Pushbutton:
- In order to change the mode of one (or more) sensor(s), the sensor(s) must be placed in a temperature zone
- Right-click on Temperature Zones in the right-hand column of GoldenGate
- Then add a temperature zone
- With a drag and drop, determine which probes are in this area.
- Make a link (drag and drop) between this area and an entry (pushbutton)
- You can select the mode (temperature or control mode) or increment the mode (temperature or control mode) to switch from one mode to the other.

Managing consent
Functional Always on
Technical access or storage is strictly necessary for the legitimate purpose of enabling the use of a specific service explicitly requested by the subscriber or user, or for the sole purpose of transmitting a communication over an electronic communications network.
Preferences
Technical access or storage is necessary for the legitimate purpose of storing preferences not requested by the subscriber or Internet user.
Statistics
Storage or technical access used exclusively for statistical purposes.
Storage or technical access that is used exclusively for anonymous statistical purposes. In the absence of a subpoena, voluntary compliance by your Internet service provider or additional third-party records, information stored or retrieved for this sole purpose generally cannot be used to identify you.
Marketing
Technical access or storage is necessary to create user profiles in order to send advertisements, or to track the user on a website or on several websites with similar marketing purposes.